
One of my readers asked how I get depth into my images. Well, a lot of it is done by dodging and burning. And the tool I use is the radial filter.
Hi Bren, one day I hope you can explain to me how you get that incredible depth in your photos… Mine feel flat in comparison.
Before I edit any photograph, I look at what I like and what I don’t like. If there is something in the image I can work with, I will give it a go. Sometimes it works, sometimes it doesn’t. But the vast majority of times, you can edit an image that would be destined for the bin into something beyond your imagination.
Take this image.

It is bland with a washed-out sky and definitely flat looking. But the one thing I liked about the image was the reflection. of the tower. So with no sky or clouds, the only thing to do with this particular image was to create a monochrome image.
Step 1 – Basic Adjustment

Once I’ve determined which part of the image I’m going to focus on, I then head straight for the Basic Panel. As you can see I lowered the exposure and increased the contrast because I knew that my radial filters would bring back the exposure to the parts of the image I want you to look at.
I also lowered the clarity, again I knew I was going to bring certain parts back into focus by using the radial filters.
Step 2 – Black and White Mix
 By playing around with the Black and White Mix, it altered the tones of the greys. You don’t have to do this but by playing with the sliders can change the grey tones of your monochrome image.
If you are working in colour to emphasise the colours you can also add, luminance and saturation to your colours as well as changing the hue. Primarily I play around with the hue sliders when I have a landscape image, as I like my greens to pop a little.
Step 3 – Radial Filters (first 4 filters)
First of all, I created four radial filters, two of which were inverted. And for each filter, I then changed the sliders to create the effect I wanted. Left to Right and then top to bottom.
1 2
3 4


For filter three I moved the filter dot so my filter affected only the red areas.

Again like filter 3, I moved the radial filter dot.
Step 4 – Radial Filters 5 and 6


Step 5 – Local Adjustment Brush
I wanted to darken little bits of the window so I used the Local Adjustment Brush

Step 6 – Crop Tool

Once you’ve finalised your edits… if it is a look that I know I would probably use again, I then save the edits as a Preset.
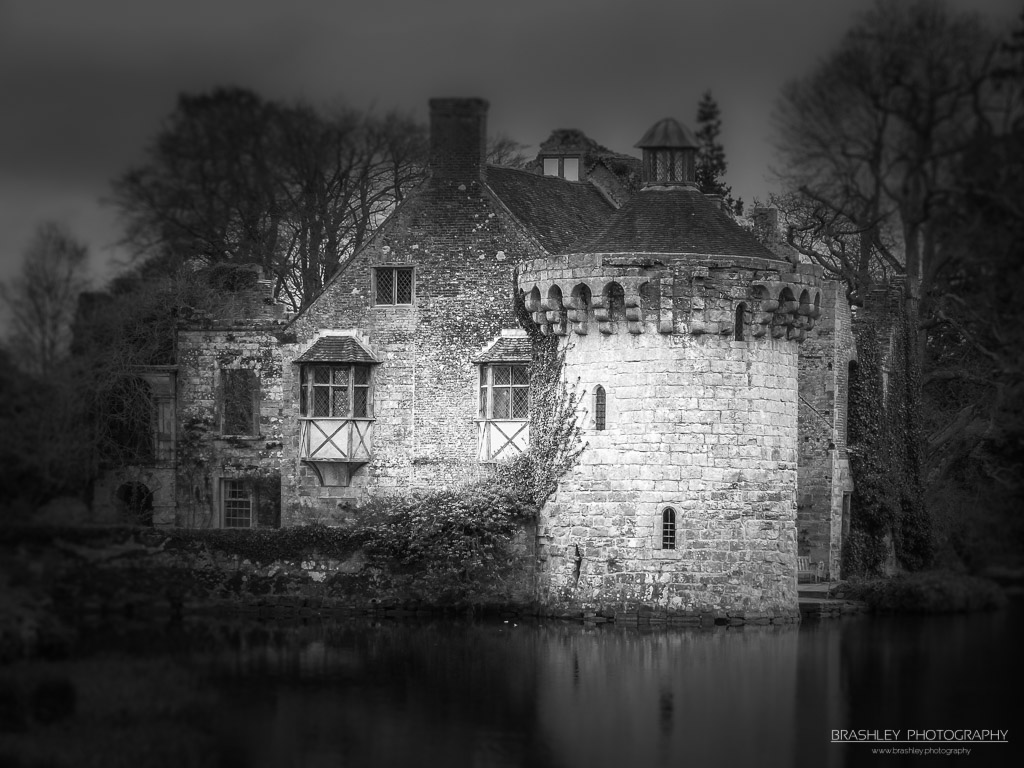
Final Image

Your comments are greatly appreciated